OK, OK I have slacked a bit and then went off on my Parts Unknown tangent, but as promised here is the second recipe that came out of my experimentation with red miso paste. On the side of the miso paste container I got, there was a recipe for miso barbeque sauce. As you might have noticed by now, I only stick to a recipe when there is actual chemistry involved that needs to be heeded in order to prevent culinary disasters. Otherwise, I pretty much try to challenge the norm. I was not particularly happy with what the ingredients in the recipe noted on the container yielded (to me it came out a little too acidy), so I adapted it and made it a little more me. Noted below you will find the ingredients list broken down into what the recipe called for and then what I chose to add to it. Hope you enjoy it as much as I enjoyed making it.
Miso Barbeque Sauce
Base Ingredients:
2 Cloves of garlic - minced
1/2 Cup of onion - minced (vidalia will probably work best if you want your sauce to be sweet)
2 TBSP Sesame oil
1/4 Cup of mushrooms - sliced (the thinner the better)
6 oz tomato paste
1/4 Cup red miso paste
3 TBSP Vinegar
3/4 Cup of Water
Extra ingredients:
1/2 Cup Packed brown sugar
1/4 Cup dry white wine
1/4 Cup maple syrup (in honor of Nadia G, one of my favorite Canadians)
In a nice, deep pan, saute your garlic and onions in the sesame oil on medium heat. Let them get nice tender and fragrant. Add the mushrooms and saute until those are nice and soft too. Add in the remainder of the ingredients and mix with a whisk, making sure to break down the lumps from the miso paste and brown sugar. Once everything is nicely incorporated, cover and allow to simmer for five to ten minutes. Uncover and let simmer on low to reduce and thicken to your desired consistency (some people like their sauce a little runny. I prefer mine a little thicker because I like it to grab on to whatever I am putting it on). Voila! You now have barbeque sauce with a little twist. Now what to do with it?
I chose to use my sauce to coat a beautiful NY Strip I had been trying to figure out what to do with. I first coated the steak in olive oil, sea salt and garlic and let it rest in that mixture for abut 5 minutes. I placed the steak on a rack and put it in the broiler for 5 minutes on each side, then I took the steak out and coated it in the barbecue sauce and broiled it again for 4 minutes on each side. It was delicious. The picture below might not do it justice but I can assure you it was wonderful (and no, I did not eat that humungus piece of meat in one sitting. I still have some self control left).
Showing posts with label Garlic. Show all posts
Monday, August 25, 2014
Sunday, August 10, 2014
My Week With Red Miso Paste
I have been in a culinary rut for a bit. I decided that the rut had to end and decided to get myself out of it by challenging myself to use an ingredient that I had not used before. As you might have guessed by now that ingredient was red miso paste. What is is? Well in essence it is fermented soybeans with some rice or barley thrown into the mix. Red miso is usually fermented for over a year and has a very robust and salty taste. If you want a little more in-depth information about miso check out this Wikipedia link that really gets into the knitty gritty of this awesome and very versatile Japanese staple.
I will start off with the first of two dishes I made with my challenge ingredient. I call it Tilapia in Red Miso Maple Glaze. Since I am flying mostly solo these days I made this recipe that is supposed to be for one but really could feed two.
1 Tilapia Fillet (usually about 3/4 lb)
1 TBSP Red Miso Paste
2 TBSP Maple Syrup
1 TBSP Olive Oil/Sesame Oil
1 Garlic clove - Minced
Optional Ingredient - Black figs
Preheat Oven to 380 degrees Fahrenheit. mix your miso paste and maple syrup together. Take your tilapia filet and spinkle the oil and garlic over it and massage them on the fillet. Add the miso maple syrup mixture and coat the fillet with it. Let the fillet rest in this nice mix for about 10 minutes. As an option I got some black figs and sliced them thinly and placed the slices on top of the fillet.
On a baking dish place a piece of foil large enough to wrap around the Tilapia fillet. Place your fillet right in the middle and fold the foil over it to contain the heat and allow the fish to sort of poach in all the wonderful liquid it was marinating in. Bake for about 20 minutes. As an added step, since I like a little crispiness, I placed the fillet under the Broiler for about 4 minutes which caramelized those figs nicely.
To serve you can either accompany your fillet with some rice and a steamed vegetable or like me you can place it on top of a nice massaged kale salad garnished with some dried cranberries.
Enjoy.
I will give you the other recipe on the next post. I am tired and need my beauty sleep.
I will start off with the first of two dishes I made with my challenge ingredient. I call it Tilapia in Red Miso Maple Glaze. Since I am flying mostly solo these days I made this recipe that is supposed to be for one but really could feed two.
1 Tilapia Fillet (usually about 3/4 lb)
1 TBSP Red Miso Paste
2 TBSP Maple Syrup
1 TBSP Olive Oil/Sesame Oil
1 Garlic clove - Minced
Optional Ingredient - Black figs
Preheat Oven to 380 degrees Fahrenheit. mix your miso paste and maple syrup together. Take your tilapia filet and spinkle the oil and garlic over it and massage them on the fillet. Add the miso maple syrup mixture and coat the fillet with it. Let the fillet rest in this nice mix for about 10 minutes. As an option I got some black figs and sliced them thinly and placed the slices on top of the fillet.
On a baking dish place a piece of foil large enough to wrap around the Tilapia fillet. Place your fillet right in the middle and fold the foil over it to contain the heat and allow the fish to sort of poach in all the wonderful liquid it was marinating in. Bake for about 20 minutes. As an added step, since I like a little crispiness, I placed the fillet under the Broiler for about 4 minutes which caramelized those figs nicely.
To serve you can either accompany your fillet with some rice and a steamed vegetable or like me you can place it on top of a nice massaged kale salad garnished with some dried cranberries.
Enjoy.
I will give you the other recipe on the next post. I am tired and need my beauty sleep.
Saturday, January 26, 2013
Simplified Beef Stew in Red Wine Sauce - An Adaptation
Hello my dear people. I hope I have not lost you all on account of my absence these past few months. My apology to any of you who might have thought I had deserted my blog. It's just been a bit brutal with work and other obligations lately, but here I am back with you and ready to bring you another recipe I hope will bring you happiness.
Winter always makes me crave food that can warm up even the dreariest of days. We have been experiencing some very frigid weather so I started looking for some good stew recipes. I found a Beef Stew in Red Wine Sauce recipe via Food & Wine on Pinterest that sounded very delicious. Of course I adapted it to fit my very lazy mood at the time. I wanted the stew I just did not want to spend too much time chopping vegetables . Here is my simplified version.
Simplified Beef Stew in Red Wine Sauce
2 lbs Beef round steaks (About 3/4" thick) cut into cubes.
2 TBSP Olive Oil
Salt and Pepper to taste
1 Medium White/Vidalia Onion - finely chopped
4-5 Garlic Cloves - Finely chopped
1 1/2 TBSP Flour
1 Bottle Red Wine (Ask your wine shop owner for one that will make a nice stew)
3-4 Medium Sized Bay Leaves
1/4 tsp Dried Thyme
Preheat your oven to 350 degrees Fahrenheit.
Put the olive oil into a dutch oven and heat on medium high heat. slowly add in your beef cubes and season with salt and pepper to taste. make sure to brown the meat cubes on all sides.
Add the onion and the garlic and cook until they become fragrant. Slowly add in the flour making sure to incorporate it without it creating any lumps. Slowly add in your wine using it to break up any flour lumps that might have formed. Stir in your bay leaves and thyme, distribute evenly. Simmer for one or two minutes and cover the pot.
Place the pot in the oven and cook for another hour and a half or so, allowing the liquid to thicken and reduce.
In the meantime you can either follow the directions on the Food & Wine recipe, or you can just make yourself some white or jasmine rice to accompany the beef.
Below is an idea for you to make something with the left overs (if you have any). I just made a pizza with some caramelized onions, chopped kale and left over beef stew cubes. It was delicious. Here is the link for the pizza dough again.
Enjoy and savor :)
Monday, September 24, 2012
Home Made Pizza = Awesome
I am sure that it is no surprise that I love cooking. I am also a big believer in not paying for anything that I can make at home myself. Today I will bid adieu to all the local and non- local pizza establishments because thanks to Pinterest (another one of my addictions) I found a recipe for great and very easy pizza dough from the blog Kayotic Kitchen. I am so excited I could make more but I really should not for obvious health reasons. Anywhoo here is a nice and easy recipe to make good use of your new found pizza dough making skills.
Semi-Healthy Home Made Cheese Pizza
Pizza Dough (Follow recipe. It will make about 2 medium size pizzas)
Sauce/Base
2 TBSP Butter
3 Small Green Onions (finley sliced)
4 Large Garlic Cloves (minced)
1 Large Carrot (Sliced into 1/4 inch pieces)
2 1/2 Medium Red Peppers (Blanched and skin and seeds removed)
Toppings
2 Cups Shredded Mozzarella Cheese (Whole or skim, your choice)
Add whatever else your heart desires
Preheat oven 350 degrees Fahrenheit.
Divide the pizza dough into two balls and roll out in whatever shape you prefer. Place on baking sheets lined with parchment paper.
Place 1 TBSP of butter in a frying pan heating it on medium heat to melt. Add the green onions and garlic and saute until well cooked and fragrant.
Place the carrot and red peppers in a food processor adding in the sauted garlic and green onions. Process until all the ingredients are finely ground.
Place the remaining TBSP of butter in the frying pan and saute your paste for about 10 minutes until it reaches a paste consistency.
Once you have your pizza dough rolled out to your satisfaction bush the edges with olive oil. Divide the carrot and pepper mixture in half. Spread on the pizza dough evenly.
Divide your cheese in half and sprinkle over each of your prepared pizzas.
Place in the oven one pizza at a time and bake for about 20 to 25 minutes or until the cheese starts to bubble and the edges of the dough start to brown.
Allow to cool for five minutes, cut and serve.
This recipe is also a great way to get the kiddies eating their veggies and they will love it. My daughter is a really picky eater and she gobbled it up.
Enjoy :)
Wednesday, August 22, 2012
Tried and Tested Recipe - Three Cup Chicken
I have always loved East Asian cuisine particularly Thai and Chinese. Their blend of flavors and combinations have always intrigued me and delighted my taste buds. I have been wanting to give a try to making both of these types of cuisine, but I have always felt intimidated by the ingredients required. Thank goodness for Cooking Channel's Ching-He Huang and her show Easy Chinese. She takes you through the process of making excellent Chinese food at home in a very comfortable manner and her recipes are great.
I found the recipe for Three Cup Chicken in Cooking Channel's website after watching the show and thought I should get out of my comfort zone and try it. This recipe was easy to follow and the results were absolutely delicious. I modified it slightly because I did not have a few ingredients and I also thought that sliced almonds would make a great addition to give it a little crunch. Here is what you will need for my modified version.
Three Cup Chicken
1 TBSP peanut oil
Garlic - 5 cloves finely chopped
Ginger - 1 inch piece, thinly sliced
1 pound boneless, skinless chicken thighs cut into 1/2 inch pieces
1/4 Cup Soy Sauce
1/4 Cup White Cooking Wine
1/4 Cup Toasted Sesame Oil
1 TBSP Brown Sugar
1/4 Sliced Almonds
Follow the link above to the recipe on Cooking Channel's website and follow the cooking instructions. Add the sliced almonds at the very end tossing them into the chicken to integrate them evenly through the chicken pieces.
This is a great recipe to get into making Chinese food at home. Serve with either white or Jasmine rice and vegetables. Enjoy :)
Saturday, July 21, 2012
Ravioli with Carrot & Ricotta Filling
Sorry for my absence this week. It seems that as we get deeper into summer things start getting more and more hectic, which is the opposite of my general expectations, but what the heck. Since I have been cooking a bit of stuff that is on my usual repertoire, I decided that I should try to be a little more creative and make something that I could share will those of you who read through my humble blog. This week I made Jumbo Raviolis stuffed with a wonderful mix of Ricotta cheese and carrots. I made my pasta using a recipe from the Food Network website. After that it was a matter of making the filling and hand rolling the pasta into thin sheets to make the ravioli. Here is the recipe for the filling:
Carrot & Ricotta Ravioli Filling
2 TBSP Olive Oil
2 Shallots (small preferable - finely diced)
4-5 Garlic cloves (Minced)
2 Carrots (Finely grated)
1 Cup Ricotta Cheese (Whole or low fat - whichever you prefer)
Salt and pepper to taste
In a pan heat the olive oil on medium high heat. Add the shallots and garlic and saute until the shallots are semi translucent and soft and the garlic is starting to brown.
Add in your carrots and saute for about 5-10 minutes, until the carrots are a deeper shade of orange.
Allow the mixture to cool slightly about 10-20 minutes.
In a separate bowl combine the carrot mixture with the ricotta. Make sure to mix well so that all ingredients are evenly distributed. Season with salt and pepper to taste.
Now you are ready to make your ravioli. If you do not have a ravioli maker (which I don't at the time), you can roll out your dough out into sheets about 1/8 inch in thickness (or slightly less - thinner pasta cooks quicker). The pictures below show you my process for making my ravioli.
Place about 1 teaspoon of filling on one side of your pasta sheet.
make sure to leave about 1 inch between them and about 1/2 inch for the edges
Fold pasta over and press between the mounds of filling.
Cut Raviolis
Roll edges of ravioli pillows to seal them in.
Finished ravioli
I topped mine off with some bolognese sauce, but you can do it any way you want (Alfredo, butter and garlic, etc...)
Enjoy
Wednesday, June 13, 2012
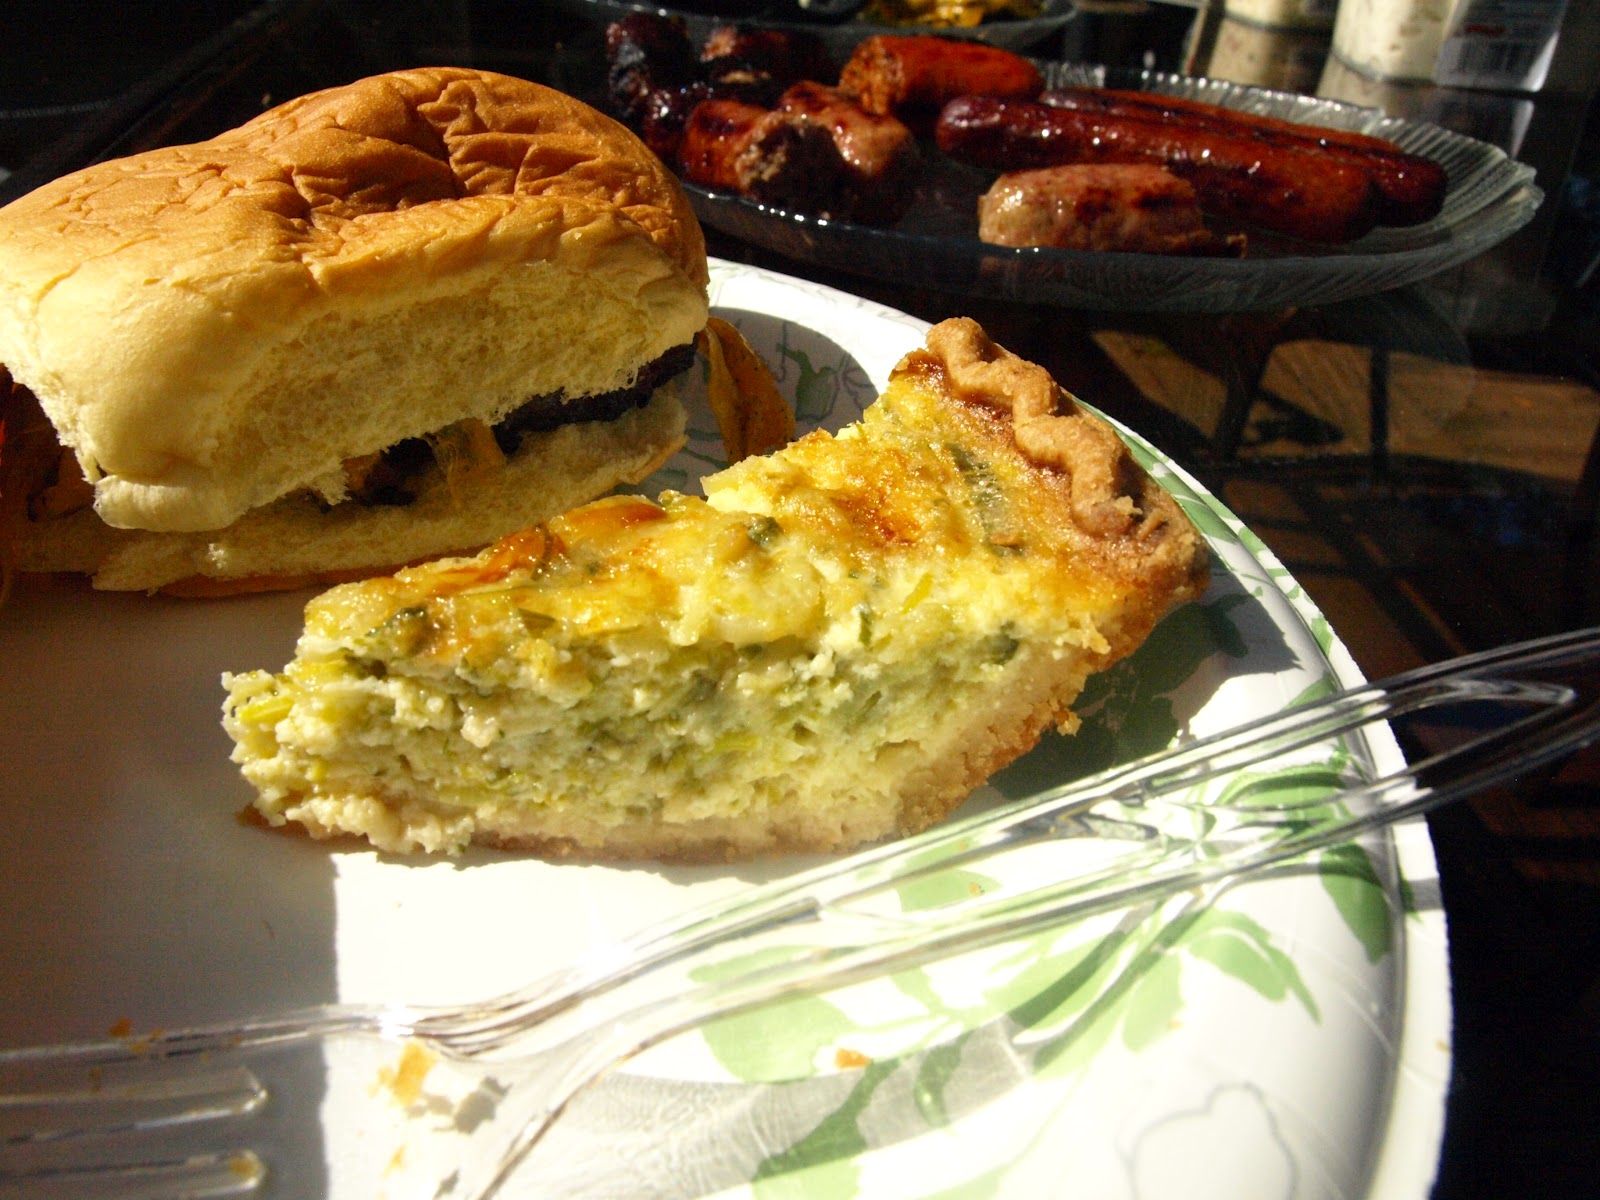
Quick Leek, Shallot & Garlic Quiche
It is nearly summer here in the northern hemisphere and the temperatures have definitely been getting up there every now and again. We have enjoyed a few weekends of wonderful weather lately so everyone is in the mood for barbecues and getting together with friends and family. With that in mind I whipped up a quiche that is quick, tasty, somewhat vegetarian (it has eggs so it can't claim the full vegetarian title), that will make those events even more enjoyable.
Here is the recipe:
Quick Leek, Shallot & Garlic Quiche
1 Pre-made Pre-cooked Pie Shell
2 TBSP Olive Oil
2 Leeks (sliced thin)
1 Shallot (Large if possible, sliced thin)
5 Cloves of Garlic (minced)
Salt & Pepper to taste
1 tsp Black Truffle Oil (optional)
3 Eggs
1 1/4 Cup Milk
1/4 Pound Gruyere Cheese (Grated - about 1 1/3 Cup)
Preheat oven to 325 degrees Fahrenheit
Put the 2 TBSP of olive oil in a frying pan and heat at medium high heat. Add the leeks, shallots and garlic to the hot oil and saute until the leeks become soft. Add in the black truffle oil (optional, but it will give the quiche an enhanced flavor). Season with salt and pepper to taste. Remove from the heat and allow this mixture to cool off.
In a bowl beat the eggs and add the milk in. Once well mixed add in the cheese and the cool leek mixture. Once all the ingredients are well incorporated pour the mixture into the pre made pie shell.
Place in the oven on a cookie sheet and bake for 25-35 minutes, or until the custard puffs in the center.
Allow to cool before serving.
Enjoy :)
Labels:
Black Truffle Oil,
Eggs,
Garlic,
Gruyere Cheese,
Leeks,
Milk,
Quiche,
Shallots
Monday, March 19, 2012
Pork Chops with Apple, Plum and Date Vinegar Reduction
As you may have read in my previous post, my husband and I have learned a little bit about how to properly butcher meat. One of the perks of taking the class was that you got to take home the meat that you butchered, so our freezer is now full of some great pork cuts, which we need to get through. To help us get started on this task I concocted this recipe using some of the fruits that did not get used from last week's grocery purchases, just an apple and some plums. Here is the recipe.
For the Pork Chops:
4 Large Bone-in Pork Chops
1-2 TBSP Olive Oil
3 Cloves of Garlic (minced or crushed to a paste)
In a large bowl combine the olive oil with the garlic. Place your pork in the bowl and coat it with the olive oil and garlic mixture.Allow the pork to sit in this mixture for at least 10 minutes.
Heat a large frying pan over medium high heat. Once the pan is hot place your pork chops in it and sear about 5 minutes on each side. Lower the heat cover the pan and allow to cook for another 5 to 10 minutes to allow the meat to fully cook through.
Remove the pork chops from the pan and let them rest.
In the meantime use the fat and juices left in the pan for the reduction. Here is what you will need:
For the reduction:
1/2 Cup Chicken Stock
1 Large Apple (Cored and sliced into thin wedges. Gala preferable because of its sweetness)
2 Plums (Pitted and sliced into thin wedges)
1 1/2 tsp Date Balsamic Vinegar (if not available you can use fig balsamic)
As mentioned above you will use the juices left by the pork chops in your frying pan. Start by de-glazing your pan with the chicken stock over medium heat.
Add in the apple and plums, cooking until they are soft and tender.
Add in the date balsamic and raise the heat slightly to allow the mixture to simmer. Allow it to reduce by 25 to 40 percent. When it coats the back of a spoon you are good to go.
To serve, simply put the fruit and a little bit of the reduction liquid on the plate. Place your pork chops on the fruit and drizzle the remaining reduction liquid on the pork chops. Accompany it with rice and a steamed vegetable and you are set.
Enjoy.
Wednesday, March 14, 2012
Lamb and Grape Turnovers
As promised here is a recipe for some delicious lamb turnovers, that will make for an easy and healthy meal. This will really only take about 30 minutes for you to make and it will be very much worth it. Here is the recipe:
Lamb and Grape Turnovers
2-3 TBSP Olive Oil
2 Shallots (thinly sliced)
4 Garlic Cloves (finely minced)
1 tsp Cumin Powder
1 tsp Ground Cinnamon
1 TBSP Dried Cilantro/Coriander leaves
1 Lb Ground Lamb
1 1/4 Cup Seedless Grapes (Quartered)
2 Packs of ready made turnover Pastry disks (I recommend Goya for those of you who live in the US, but any other brand will do)
1 Egg (beaten for egg wash)
Preheat oven to 350 degrees Fahrenheit (180 degrees Celsius)
Heat the oil over medium high heat in a large frying pan. Add in the shallots and garlic and saute until the shallots start to look translucent.
Reduce the heat to medium and add in your cumin, cinnamon and cilantro, stirring well to incorporate into the shallots and garlic. If this starts to get dried out add a tablespoon of water.
Add the lamb and raise the heat to a medium high again to brown the meat. Once the meat has browned add the grapes adding a little water if necessary. Cover the pan and cook for about five minutes then remove from heat.
For the how to on getting your turnovers together you can refer to my post on Empanadas.
Place your assembled turnovers on baking sheets lined with parchment paper and give them a nice egg wash with a silicone brush.
Place your trays one at a time in the oven, and bake for about 20-25 minutes until the crust has turned a nice golden brown. Remove from oven and allow to rest for 10 minutes.
You can serve this with a nice simple mixed greens salad and some grapes, drizzled with a nice balsamic vinegar.
Enjoy.
Lamb and Grape Turnovers
2-3 TBSP Olive Oil
2 Shallots (thinly sliced)
4 Garlic Cloves (finely minced)
1 tsp Cumin Powder
1 tsp Ground Cinnamon
1 TBSP Dried Cilantro/Coriander leaves
1 Lb Ground Lamb
1 1/4 Cup Seedless Grapes (Quartered)
2 Packs of ready made turnover Pastry disks (I recommend Goya for those of you who live in the US, but any other brand will do)
1 Egg (beaten for egg wash)
Preheat oven to 350 degrees Fahrenheit (180 degrees Celsius)
Heat the oil over medium high heat in a large frying pan. Add in the shallots and garlic and saute until the shallots start to look translucent.
Reduce the heat to medium and add in your cumin, cinnamon and cilantro, stirring well to incorporate into the shallots and garlic. If this starts to get dried out add a tablespoon of water.
Add the lamb and raise the heat to a medium high again to brown the meat. Once the meat has browned add the grapes adding a little water if necessary. Cover the pan and cook for about five minutes then remove from heat.
For the how to on getting your turnovers together you can refer to my post on Empanadas.
Place your assembled turnovers on baking sheets lined with parchment paper and give them a nice egg wash with a silicone brush.
Place your trays one at a time in the oven, and bake for about 20-25 minutes until the crust has turned a nice golden brown. Remove from oven and allow to rest for 10 minutes.
You can serve this with a nice simple mixed greens salad and some grapes, drizzled with a nice balsamic vinegar.
Enjoy.
Thursday, March 8, 2012
Gnocchi Alfredo with Pancetta and caramelized Shallots
This one is actually a recipe I made a while back, but I had misplaced the picture (which I luckily found today). You can say it is long overdue, especially because I need to give credit to my very wonderful friend Josh for the tremendous curing job on the pancetta. He has become some sort of renaissance man who not only knows how to lead in the business world of theater but who can make mozzarella, ricotta and other smoked and cured meats. In our group of friends we have agreed that if the apocalypse ever does take place we want him on our side to ensure our survival. He is pretty darn awesome.
I digress, so let's get back to the point. I cheated a bit because I did not make the gnocchi, but I did make a simple Alfredo sauce and a great pancetta topping. This is a nice and easy dish that will literally take you at most 20 minutes to put together (Ronnie I hope you are still reading because this one will make it easy for you to get a meal together during your busy week).
Gnocchi Alfredo with Pancetta and Caramelized Shallots
1 Pack of store bought gnocchi (1pound recommended)
For the Alfredo Sauce:
1 Pint Heavy Cream
2 TBSP Butter
3-4 Cloves of Garlic (crushed or finely diced)
1 1/2 Cups Grated Parmesan
Pepper to taste
For the Pancetta and Caramelized Shallot Topping:
1/4 Pound Pancetta (cut up into small cubes)
2 Shallots (finely sliced)
Start by getting 6 cups of water in pot with some salt and a small amount of olive oil and bringing this to a boil. Add your gnocchi and cook for about 5-6 minutes or until tender (but please make sure not to over cook it because it will not be good eats if you do).
In a sauce pan melt your butter and add in the garlic, and saute until the garlic starts to brown. Add in your heavy cream and stir. Add in the Parmesan a little bit at a time while simultaneously stirring it into the heavy cream mixture quickly with a whisk (what you want is to incorporate the cheese into the cream slowly to allow it to become a part of it without creating clumps). Add your pepper and remove the sauce from the burner.
The gnocchi and the sauce should be cooking simultaneously because they will take about the same amount of time to cook and because you want to make sure that your sauce is ready as soon as you drain your gnocchi so that you can immediately coat it with the sauce.
In a frying pan, preheated over medium high heat start cooking your Pancetta the goal is to heat it through and sear it just a bit, and to let it render some fat. once you see the Pancetta start to brown (about 5 minutes) remove it onto a plate with a paper towel to drain any extra oil. Use the fat rendered onto your pan to caramelize your shallots. Once this is done return the Pancetta to the pan, incorporate it into the shallots and remove the pan from the burner. Add on top of your gnocchi alfredo with a little fresh grated Parmesan and enjoy.
Tuesday, March 6, 2012
Bobotie Adaptation
One of the many reasons I am grateful for having lived outside the US is how much that has helped to broaden my horizons when it comes to food. I am particularly grateful for the time my family and I spent in Dubai, because were it not for it I would have missed out on a lot of cuisine from Africa that I might not have otherwise experienced. One of my favorite food finds during that time was Bobotie. For my US peeps Bobotie is a dish typical of South Africa, and the best way I can describe it is to say that it is like meatloaf but sooooo much better because of all the great flavors that go into it. I have made my version of it adapted from three different recipes, one which I saw in Spinney's Magazine while I was living in Dubai and the other two I found on the internet recently. I took ingredients that the recipes had in common and kept those while omitting stuff like raisins that my husband is not very keen on. Anyway here is my recipe:
Bobotie - An Adapted Version
1 Lb Ground/Minced Beef
1 Lb Ground/Minced Lamb
1 Large Carrot (Grated)
2-3 TBSP Olive Oil
3-4 Shallots (thinly sliced)
4 Garlic cloves (minced)
2 TBSP Curry Powder
2 tsp Tumeric Powder
3 tsp All Spice
2 tsp Ginger Powder
1/2 tsp Ground Cloves
1/4 Cup Water
2 Slices of Bread (Crumbled - I used Arnold's Whole Grains Oatnut Bread)
1/4 Cup Milk
Salt and Pepper to taste
4-5 Bay leaves
Preheat oven to 365 degrees Fahrenheit.
Heat the olive oil over medium high heat in a dutch oven adding the shallots and garlic. Saute until the shallots have become translucent.
Add in the spices adding water if necessary in order to prevent the mixture from becoming dry and clumpy.
Take the pot off the stove and add in your ground beef and lamb making sure to incorporate the shallot, garlic and spice mixture evenly throughout the meat.
Add in the grated carrot and incorporate evenly into the mixture.
In a separate bowl mix the bread with the milk allowing the bread to absorb the milk. Add this to the meat mixture making sure to incorporate it as evenly as possible.
Insert the bay leaves at even intervals, and now you are ready to place your pot in the oven. Make sure to cover and bake for about 1 hour.
** I want to note that you do not need to have a dutch oven to make this. You can just as easily prepare everything in a large pan and then transfer everything into a baking dish. Just make sure that the baking dish is deep enough to fit the meat mixture as well as the topping that is added onto it.
As you get close to the end of the baking time (5 minutes or so) you can start making the topping. Here is what you need to make it:
Bobotie Topping
1 Cup of milk
2 Large Eggs
1 tsp Tumeric
1/2 tsp Salt
Mix all the ingredients together until well incorporated and set aside briefly.
Once your baking time is done remove the baking dish/dutch oven from the oven and remove the foil/lid.
Raise the oven temperature to 400 degrees Fahrenheit
Pour the topping over the meat and place your dutch oven/baking dish back in the oven (uncovered) and bake for an additional 15 minutes or until the topping starts to turn a golden brown.
Remove from oven and allow to cool for a few minutes. It is recommended that this dish be served over yellow rice, but Jasmine rice works well too.
Enjoy.
Here are the links to some of the recipes I drew inspiration from
Bobotie Recipe at Epicurious
Cleopatras' Bobotie - with secret sauce
Bobotie - An Adapted Version
1 Lb Ground/Minced Beef
1 Lb Ground/Minced Lamb
1 Large Carrot (Grated)
2-3 TBSP Olive Oil
3-4 Shallots (thinly sliced)
4 Garlic cloves (minced)
2 TBSP Curry Powder
2 tsp Tumeric Powder
3 tsp All Spice
2 tsp Ginger Powder
1/2 tsp Ground Cloves
1/4 Cup Water
2 Slices of Bread (Crumbled - I used Arnold's Whole Grains Oatnut Bread)
1/4 Cup Milk
Salt and Pepper to taste
4-5 Bay leaves
Preheat oven to 365 degrees Fahrenheit.
Heat the olive oil over medium high heat in a dutch oven adding the shallots and garlic. Saute until the shallots have become translucent.
Add in the spices adding water if necessary in order to prevent the mixture from becoming dry and clumpy.
Take the pot off the stove and add in your ground beef and lamb making sure to incorporate the shallot, garlic and spice mixture evenly throughout the meat.
Add in the grated carrot and incorporate evenly into the mixture.
In a separate bowl mix the bread with the milk allowing the bread to absorb the milk. Add this to the meat mixture making sure to incorporate it as evenly as possible.
Insert the bay leaves at even intervals, and now you are ready to place your pot in the oven. Make sure to cover and bake for about 1 hour.
** I want to note that you do not need to have a dutch oven to make this. You can just as easily prepare everything in a large pan and then transfer everything into a baking dish. Just make sure that the baking dish is deep enough to fit the meat mixture as well as the topping that is added onto it.
As you get close to the end of the baking time (5 minutes or so) you can start making the topping. Here is what you need to make it:
Bobotie Topping
1 Cup of milk
2 Large Eggs
1 tsp Tumeric
1/2 tsp Salt
Mix all the ingredients together until well incorporated and set aside briefly.
Once your baking time is done remove the baking dish/dutch oven from the oven and remove the foil/lid.
Raise the oven temperature to 400 degrees Fahrenheit
Pour the topping over the meat and place your dutch oven/baking dish back in the oven (uncovered) and bake for an additional 15 minutes or until the topping starts to turn a golden brown.
Remove from oven and allow to cool for a few minutes. It is recommended that this dish be served over yellow rice, but Jasmine rice works well too.
Enjoy.
Here are the links to some of the recipes I drew inspiration from
Bobotie Recipe at Epicurious
Cleopatras' Bobotie - with secret sauce
Tuesday, February 14, 2012
Chicken Lasagna
This recipe is very special to me because it was one of the things I always loved that my mom made (even though mine will never come close to how good my mom's is). This is the one that I would always request she make on my birthday. Here is my recipe.
Chicken Lasagna
9 inch by 12 inch Baking Dish
Lasagna pasta sheets (you will need enough for a base layer, 3 layers of filling in between and for the top)
3 large Chicken Breast Halves
3 Cups Chicken Stock/Broth
2 TBSP Olive Oil
2 Plum Tomatoes (Seeded, pealed and finely diced)
1 Large Shallot (Thinly sliced and diced)
5 Cloves of Garlic (Thinly sliced)
2 Green Onions (Thinly sliced)
1/2 Red Pepper (Finely diced)
1 Large Carrot (Grated)
1 lb Shredded Mozzarella Cheese
2 Cups Ricotta Cheese
1 Cup Freshly Grated Parmesan Cheese
Bechamel Sauce (see recipe at end)
Preheat oven at 390 degrees Fahrenheit.
Start by heating your chicken stock in a medium pot add the chicken breasts and allow to cook through. Once cooked through, remove the breasts from the broth and allow to cool. When they have cooled off shred them as you would pulled pork (you want long stringy pieces).
In a large pan heat your olive oil and add the tomatoes, shallot, garlic, green onions, red pepper and carrot and cook until the onions become translucent. (If your mixture starts to dry out a bit add a bit of the chicken stock used to cook the chicken breasts). Add salt and pepper to taste.
Add the chicken to the vegetable mixture making sure to incorporate the chicken evenly and allowing the vegetable base to coat it. Once this is done set it aside.
In a bowl combine the ricotta and Parmesan cheeses until the Parmesan is evenly distributed into the ricotta. Set it aside.
Now start getting your pasta sheets ready in a large pot of boiling water with a pinch of salt and olive oil (I find it best to cook the pasta in batches on a per layer basis because it prevents the pasta from over cooking).
Get your baking dish ready by greasing the bottom of it with a little olive oil. Start by laying down a layer of pasta at the bottom. Add half of the chicken and vegetable mix onto the layer of pasta making sure to distribute it evenly. Add the bechamel sauce on top of the chicken vegetable mixture (this will insure that your chicken will not dry out) and top out with a sprinkling of grated mozzarella. Now add another layer of pasta. The next layer is going to be your ricotta Parmesan cheese mixture distributed thinly and evenly. Add another layer of pasta and add the remaining half of your chicken vegetable mixture. Top this layer off with Bechamel sauce and a sprinkling of shredded Mozzarella. Add the last layer of pasta and add the rest of the shredded Mozzarella.
Place your baking dish at the center of your oven and allow the lasagna to cook until you see the ingredients bubbling and the mozzarella on top starts to brown. About 20-30 minutes.
Once ready remove from oven and allow it to rest for at least 15 minutes. Serve and enjoy
Bechamel Sauce (my version at least)
2 Cups Chicken Stock/Broth (you can use the stock/broth used to cook the chicken breasts)
1/4 Cup Heavy Cream
1/4 Cup Flour
Pinch of Nutmeg
Salt and Pepper to taste (if necessary)
In a medium sauce pot, heat up your chicken stock/broth and heavy cream on medium heat until they they start to lightly simmer. Start sifting in the flour while whisking it into the broth and cream. Whisk until you are satisfied that there are no lumps and the flour has been well incorporated into the wet ingredients. Add the pinch of nutmeg. Allow to cook for about five additional minutes stirring frequently. Remove from heat and set aside to be used when needed)
Tuesday, January 31, 2012
Empanadas
Well it took me long enough but here I am again. As promised I told you I would be delving into my South American roots so here we go. This is a super easy recipe that I concocted from watching my step aunt Lila and my mom make Argentinian style empanadas. I did not make the dough for the empanada exterior (I promise we will get into it at a later date). I just wanted to make sure that you knew that there is an easy way to make these tasty treats so that you can enjoy them rather than feeling spent after making them. Anywhoo here is my little tutorial for how to make these delicious treats:
Ingredients:
2 Packs Goya(or insert your brand here) dough for Turnover Pastries (there are 10 in each pack - find them in the frozen food section)
Filling:
1-2 TBSP Olive Oil
1 Plum tomato (finely diced)
1/2 Large red pepper (finely diced)
3-4 Cloves of garlic (minced)
1/2 Large white/sweet onion (finely diced)
1 Green onion (finely diced)
1 TBSP fresh cilantro/coriander (finely cut)
1 tsp Cumin
2 large chicken breasts (cooked and shredded)
1 Large Yukon Gold potato(cooked and cubed)
1 Hard boiled egg (chopped into very small pieces)
Salt and Pepper to taste
In a large pan heat your olive oil at medium high heat. Add in all your vegetables and coat them with the oil. Saute your veggies until they have started rendering juices and the onions are starting to become translucent.
Add the cilantro and cumin and stir to distribute them evenly.
Add the shredded chicken breasts and potato. Stir in to distribute them evenly and to allow the vegetables and their juices to coat them.
Add the hard boiled egg to the mixture and stir to distribute evenly.
Add Salt and Pepper to suit your taste.
Once you are happy with the taste take the pan off the heat and let it rest while you get your pastry disks lined up and ready to receive the filling. Make sure that your filling is still moist but not drenched in liquid from the vegetables as this will make it difficult for you to keep the pastry together.
Now it is time for the step by step on how to put these lovelies together.
Place your pastry disk on the counter and spoon about
1 1/2 TBSP at the center of the disk
Gently fold your pastry disk in half making sure to
press the edges firmly together.
Press firmly down on the edges with a fork,
starting at the center and moving outward
Once you have completed these steps with all your pastry disks you are ready to either fry or bake these. I chose frying because although I like a baked empanada, there is something about frying these that makes them taste the way I remember them from earlier years in my life (yes I am older than I care to remember).
If you choose to fry them make sure to use peanut oil/ safflower oil, something with a high heating temperature in order to make sure your home does not turn into a smoky mess. Use about 2 cups of oil in a frying pan about 9 inches in diameter at medium heat or just a little bit above this (you do not want your oil to get too hot or you will have burnt empanadas in no time). Also you want enough oil to immerse the empanadas to allow them to cook and be turned over to get them to a nice golden brown so if 2 cups is not enough for your pan, add a little more.
If you choose to bake these make sure you line your baking sheets with parchment paper and give your empanadas a nice egg wash. Turn your oven on at 350 degrees Fahrenheit and bake the empanadas until they are a golden brown.
Here is the final result for the fried ones
Like I mentioned in one of my previous posts, there are quite a lot of different styles of empanadas so we will be having a little more fun with these as the year progresses. For now I hope you try these and that you enjoy them as much as my husband and I did.
Sunday, December 4, 2011
Wonton Potato Curry Pockets - AKA Curry Puffs without the puff
These little treats are jam packed with flavor. They were inspired by Thai restaurant curry puffs which I have been wanting to make for a long time. I was trying to put together a dinner because One of my husband's cousins was coming over. I made my Thai Style chicken with the coconut curry sauce, jasmin rice and some steamed broccoli, but I was feeling like we should have a pre-diner snack, so I concocted a recipe and tried to put it together with the least amount of hassle.
For the filling:
2 TBSP butter
2 Medium Shallots (sliced thin)
2 large cloves of garlic (minced)
1 Green onion (sliced thin)
2 large Yukon gold potatoes (Diced)
1 Large carrot (diced)
2 TBSP Mild Yellow Curry powder
1/2 Cup of water
For the pockets:
1 Pack of wonton wrappers
Recipe:
Melt the butter in a medium sauce pan on medium heat. Add the shallots, garlic and green onions until the shallots become translucent and start to caramelize. Add the potatoes and carrot and cook for 5 minutes stirring frequently to prevent ingredients form burning. Add the water and curry making sure to add the curry powder slowly to prevent lumps. Cook until the water is reduced enough to make a thick gravy.
Set the filling aside and get your wonton wrappers ready by slicing them diagonally to create triangles. Once this is done start getting your Pockets together. The pictures below show the step by step procedure on how to fold your wrappers and get them ready for frying/sauteing.
place your wonton triangle on a flat surface
Place about 1 teaspoon of filling
at the center of your wonton triangle
Make your first fold as shown above.
Make your second fold as shown above.
Make your third fold as shown above.
Finally tuck the last corner under to complete your triangle shaped pocket.
To cook these simply fry in a large pan with a thin layer of Safflower or canola oil until they are golden brown on both sides. Serve with either duck sauce or red chilly dipping sauce. Enjoy.
Tuesday, November 22, 2011
Roast Chicken with Couscous
Today has been a wet dreary day which made me think that a nice roast chicken stuffed with something nice and aromatic might just be the thing to make for diner. What else could be better to compliment the roast chicken, than couscous infused with the juices left over form the roast chicken. Here is the recipe:
1 Whole Chicken (cleaned)
2TBSP Olive Oil
4 Garlic Cloves (Minced)
Salt and Pepper to taste
1 tsp Mild Yellow Curry
Pre-heat oven to 420 degrees Fahrenheit.
Place the olive oil, minced garlic, salt, pepper and curry in a wide deep bowl and whisk together. Place your chicken in the bowl and coat it in this mixture. Set aside.
For the cooking base:
1 TBSP Olive Oil
1/2 Red Pepper (finely chopped)
2 Shallots - medium (thinly sliced)
In a dutch oven heat the olive oil on medium high heat. Add the red pepper and shallots and saute until the shallots start caramelizing.
For the aromatic stuffing:
2 Green onions (sliced lengthwise)
3 Sprigs of Cilantro
4 cloves of garlic (smashed)
Stuff your chicken with these and place it in the dutch oven with the caramelized shallots and red pepper.
Add to this 3 cups of water and one large carrot (cut in thick slices about 1/4 inch thick). Cover the dutch oven and place in the oven for about 1hr, checking in about every 20 minutes or so to baste.
Remove dutch oven from oven and check to make sure chicken is cooked through. Uncover and return to the oven for an additional 5-10 minutes to allow the skin to brown.
Remove the chicken from the dutch oven and place on a baking dish to allow to rest.
For the couscous:
At this point there should be about 1 cup to 1 1/2 cups of rendered juices left in your dutch oven (if it is less than this add some more water and heat up a bit, checking to make sure that the flavor of the juices is right for your palate).
On the stove top heat the rendered juices to a boiling point and then turn off the burner.
If this is your first time making couscous all you have to know is that the ratio of liquid to couscous is 1 to 1. Add the amount of couscous corresponding to the amount of liquid you have in your dutch oven. Cover the dutch oven and let it rest for about 5 minutes to allow the couscous to absorb all the tasty fluids.
Fluff the couscous with a fork and serve along with your favorite chicken parts. Enjoy :)
Sunday, November 20, 2011
Easy Cilantro Infused Chicken
Here is a nice easy recipe for those days when you just want to have as little fuss as possible. It is not just easy it is also very tasty. Anyway here you go:
4 Large chicken legs (Either whole or with thighs separate from drumsticks)
2 TBSP Olive Oil
3 Large Garlic Cloves (minced)
3 TBSP Cilantro leaves (chopped)
2 tsp Mild Yellow Curry
3/4 C Water
Salt & Pepper to taste
Preheat oven to 420 degrees Fahrenheit.
Put the olive oil, garlic and cilantro in an oven dish and mix together. Add the chicken and coat in the mixture. Place the chicken pieces with the skin side facing up. Sprinkle the chicken with the curry, salt and pepper. Add the water, cover and put in the oven.
Cook Chicken for about 25-30 minutes (until well cooked through) allowing the chicken to simmer in the cilantro mixture.
Uncover and baste the chicken with the liquid in the baking dish, and cover again for another 10 minutes.
Change your oven form baking to broiler setting. Take out the oven dish and uncover, basting the chicken again and place back in the oven for an additional 5- 10 minutes to allow the skin to brown and crisp to desired point.
Thursday, November 10, 2011
More Comfort Food, Because I Am Worth It
Today I was really craving something that would lift my spirits. Nothing can lift spirits up like food that reminds you of childhood, and nothing reminds me of childhood more than red beans. I used to love when my mom made these for me. I get the feeling my daughter feels the same way when I make them for her. Perhaps this is becoming a tradition. Here is my recipe:
1 Bag Red Kidney Beans (aprox 1 lbs, cleaned and rinsed) (I highly recommend Goya)
4 Cups of water
1 TBSP Extra Virgin Olive Oil
4 Large Cloves of Garlic (crushed or minced)
2 Green Onions (sliced thin)
1 large celery stalk (sliced thin)
1 Plum/Roma tomato (De-seeded and diced)
1/2 Red Pepper (diced)
1 Large Carrot (grated)
2 Bone in Pork Chops
Salt and Pepper to taste
Put the red beans and 4 cups of water in a deep pot. Turn on burner on high heat and let the water reach a boil. Lower the heat and allow the beans to continue to simmer.
In a medium to large dutch oven add the oil, heat and add the garlic, onions, celery, tomatoes and red peppers and sweat them stirring frequently until the celery becomes translucent. Add the carrots and allow them to sweat and integrate into the other ingredients to form a nice thick base.
Add the beans, pork chops, and about 1 more cup of water into the dutch oven with the vegetable base. Cook on high until everything is simmering. Season with salt and pepper to taste. Lower the heat to medium low and allow the ingredients to stew, stirring every 20 minutes or so until the beans are tender and the meat on the pork chops falls off the bone. Enjoy.
Subscribe to:
Posts (Atom)