Saturday, July 21, 2012

Ravioli with Carrot & Ricotta Filling


Sorry for my absence this week. It seems that as we get deeper into summer things start getting more and more hectic, which is the opposite of my general expectations, but what the heck. Since I have been cooking a bit of stuff that is on my usual repertoire, I decided that I should try to be a little more creative and make something that I could share will those of you who read through my humble blog. This week I made Jumbo Raviolis stuffed with a wonderful mix of Ricotta cheese and carrots. I made my pasta using a recipe from the Food Network website. After that it was a matter of making the filling and hand rolling the pasta into thin sheets to make the ravioli. Here is the recipe for the filling:


Carrot & Ricotta Ravioli Filling

2 TBSP Olive Oil

2 Shallots (small preferable - finely diced)
4-5 Garlic cloves (Minced)
2 Carrots (Finely grated)

1 Cup Ricotta Cheese (Whole or low fat - whichever you prefer)
 Salt and pepper to taste


In a pan heat the olive oil on medium high heat. Add the shallots and garlic and saute until the shallots are semi translucent and soft and the garlic is starting to brown.

Add in your carrots and saute for about 5-10 minutes, until the carrots are a deeper shade of orange.

Allow the mixture to cool slightly about 10-20 minutes.

In a separate bowl combine the carrot mixture with the ricotta. Make sure to mix well so that all ingredients are evenly distributed. Season with salt and pepper to taste.

Now you are ready to make your ravioli. If you do not have a ravioli maker (which I don't at the time), you can roll out your dough out into sheets about 1/8 inch in thickness (or slightly less - thinner pasta cooks quicker). The pictures below show you my process for making my ravioli.

 Place about 1 teaspoon of filling on one side of your pasta sheet.
make sure to leave about 1 inch between them and about 1/2 inch for the edges
 Fold pasta over and press between the mounds of filling.

 Cut Raviolis

 Roll edges of ravioli pillows to seal them in.

 Finished ravioli 


I topped mine off with some bolognese sauce, but you can do it any way you want (Alfredo, butter and garlic, etc...)

Enjoy

Friday, July 6, 2012

The Great Sesame in Everything Meal


This meal did not start with the intent to use sesame as a part of everything but little by little it turned into exactly that. I had these great pork chops that were about an inch in thickness with that wonderful strip of fat on the one side and I was trying to figure out a way to make them not only taste good but look good as well. The other thing to think about was what sides to have with the pork chops. I did not want anything too complicated so I settled on mashed potatoes and baby bok choi.


Sesame Seed Crusted Teriyaki Pork Chops

4 Boneless Pork Chops
3 TBSP Teriyaki Sauce
1 TBSP Sesame Oil
Sesame Seeds
1 to 2 Cups Vegetable Stock
Salt & Pepper to taste

Preheat oven to 380 degrees Fahrenheit

Put the Teriyaki sauce and sesame oil in a medium to large deep baking dish. Place the pork chops in the baking dish and coat them in the Teriyaki mixture and allow them to sit in the mixture for 15 to 20 minutes.

Sprinkle the sesame seeds over the top and bottom of the pork chops. Add in 1 Cup of the vegetable stock and salt and pepper.

Cover with aluminum foil, place in the oven and cook for about 30 minutes. During this time check in about 15 to 20 minutes into the cooking time to make sure that there is still plenty of liquid in the baking dish. If it has started to dry out add a bit more of the stock (you should have at least 1/2" of liquid at the bottom of your dish). Once the cooking time has lapsed check with a food thermometer to make sure that the internal temperature of the meat is at least 145 degrees Fahrenheit. If you are curious about food safety and proper temperatures for any food here is a link that will be very useful to you).

Uncover the pork chops, baste them with the liquid in the pan and set your oven to broil. Allow meat to broil for 5 minutes or until you see the top start to to turn a golden brown. Remove from oven and allow to rest.


While your meat is cooking you can make the mashed potatoes and bok choi. I think the mashed potatoes are very self explanatory so I will not go into the method (we all do them our own way any way). For the bok choi it was very simple. Just separate and clean your bok choi leaves. place about one tablespoon of sesame oil in a frying pan. Heat it up place the bok choi in the pan toss a few times and that is it. This is a very tender vegetable and it does not require a long time for cooking, so don't over do it. 2 - 3 minutes in the pan should be more than enough.

The only thing I did extra for the mashed potatoes was a Teriyaki sesame gravy. I made it using the left over liquid from the pork chops. I placed it in a sauce pan and added corn starch a little bit at a time until the liquid reached the right consistency (it should evenly coat the back of a spoon and not be too runny).

Well that is all. I hope you enjoy it.

Monday, July 2, 2012

Dun Well Doughnuts - I Drool

Thanks to the lovely people from With Love From Brooklyn and their great facebook posts, I have found a new favorite place to indulge my sweet tooth. Dun Well Doughnuts is very aptly named because my oh my can they make a good doughnut. And by good I mean really good in every sense. The flavor selection is fantastic, the sizes epic, the taste tremendous, and they are completely vegan (for those of you who might care). If you like your coffee with cow milk you will not be able to get it here, but there are plenty of other milk options on hand to make it worth your while. Trust me, you will not be disappointed and the people who own the store and those work there could not be more pleasant if they tried.This place is yet another gem on the Brooklyn crest and very worth while checking out.


 Of course my daughter had to have the chocolate glazed.

 Glazed and peanut butter & jelly doughnuts

Peanut butter & jelly doughnut - An inside view


Monday, June 25, 2012

Phylo Dough Guava, Cherries & Queso Blanco

These past few weeks I had been on a rut, which is why not much had been posted on this blog. I had been noticing that every time I went to the grocery store I was buying exactly the same stuff week after week. Last week I finally decided that I would start looking out for ways in which I could break my habitual shopping. One of the purchases I made was phylo dough sheets, because I wanted to try my hand at making various types of pastries. I also got a block of guava paste and some queso blanco. Guava paste is something that I grew up with and love. When I was a little girl living in Colombia my mom used to put a small cube for snack time in my lunch box (mine was a Bee Gees tin one with matching thermos). Anyway, it was only later in life that I found out that guava is also a tremendously nutritious little fruit.

Alright, enough of my rambling. Here is what you will need to make these pastries. I made one cherry and one guava pastry:

Ingredients:
3 TBSP Butter (Melted-You will use this to brush it on the phylo sheets)
4 Phylo Sheets
1 Cup fresh Cherries (Pitted and cut in half)
1/4 Cup Brown Sugar (Dark or Light, it is up to you and your preference)
2-4 oz Guava Paste Block (Cut into slices about 1/4" thick)
1 32oz block of Queso Blanco (Grated)

Preheat oven to 350 degrees Fahrenheit

Cherry Pastry How To:

Take two of the phylo sheets for  this pastry.

Place the fist sheet on a cookie sheet lined with parchment paper, and coat with melted butter using a pastry brush. Fold in half and coat the top with another bit more of the melted butter. Place the second sheet on top and repeat the butter coating process. Your pastry will now have four layers of phylo.

Place half of your cherries at the center making a thick stripe with them but allowing enough room on the pastry so that you can fold the pastry and cover the cherries on both sides and a little bit of room at the ends so that you can fold those over as well. (see pictures below). Drizzle the cherries with the brown sugar, and then add a layer of the queso blanco. Repeat these steps with the remaining half of the cherries.

Fold the short ends of the phylo dough in first and then proceed folding over the sides making sure that everything is tucked in well so that the pastry will stay together.

Place in the baking sheet in the oven and bake the pastry for  20-30 making sure to check it often to ensure that the phylo is not browning too quickly or burning. You will know it is ready when your phylo looks golden brown and the contents look like they are bubbling.

For the guava pastry you will follow the same steps as for the cherry pastry except this one will only get the guava paste slices and cheese without the brown sugar.

Let them cool slightly and serve either on their own or with some ice cream of your choice.


Friday, June 15, 2012

Baked Does it Again

I know there are a number of people out there who do not live anywhere near Brooklyn and that bastion of goodness, Baked. Rest at ease because the Baked boys have heard you loud and clear and have made some of their mixes available to the masses via Williams-Sonoma. Granted it is not a huge selection, but it should suffice until you can make your way to this mecca of delicious baked treats.


I on my part decided to buy their book Baked: New Frontiers in Baking. I am absolutely in love with their recipe for brownies. My husband and daughter do not mind at all if I make them a batch. This book is packed with great recipes of their most popular confections. I also gives the reader great ideas for home made gifts and how to decorate their confections. All in all a great buy and something that your family will be able to enjoy as much as you will enjoy making stuff for them.


Wednesday, June 13, 2012

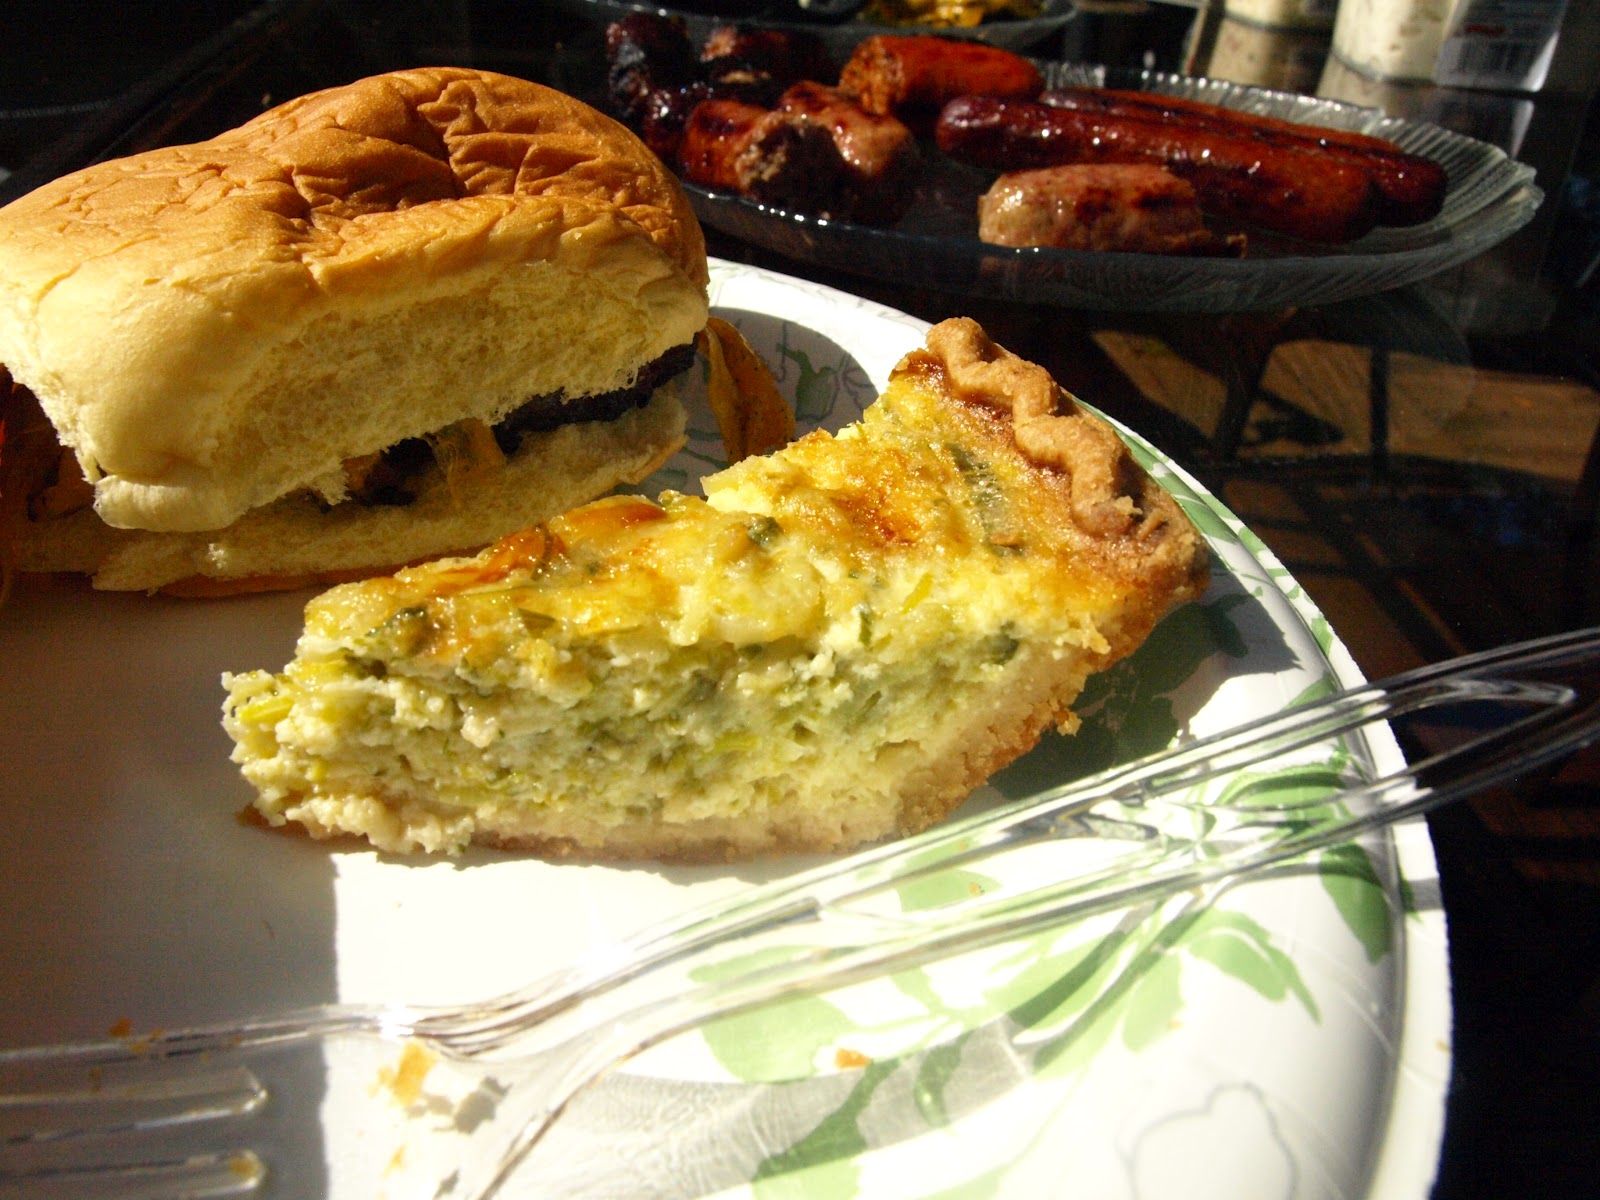
Quick Leek, Shallot & Garlic Quiche


It is nearly summer here in the northern hemisphere and the temperatures have definitely been getting up there every now and again. We have enjoyed a few weekends of wonderful weather lately so everyone is in the mood for barbecues and getting together with friends and family. With that in mind I whipped up a quiche that is quick, tasty, somewhat vegetarian (it has eggs so it can't claim the full vegetarian title), that will make those events even more enjoyable.


Here is the recipe:

Quick Leek, Shallot & Garlic Quiche

1 Pre-made Pre-cooked Pie Shell
2 TBSP Olive Oil
2 Leeks (sliced thin)
1 Shallot (Large if possible, sliced thin)
5 Cloves of Garlic (minced)
Salt & Pepper to taste
1 tsp  Black Truffle Oil (optional)
3 Eggs
1 1/4 Cup Milk
1/4 Pound Gruyere Cheese (Grated - about 1 1/3 Cup)

Preheat oven to 325 degrees Fahrenheit

Put the 2 TBSP of olive oil in a frying pan and heat at medium high heat. Add the leeks, shallots and garlic to the hot oil and saute until the leeks become soft. Add in the black truffle oil (optional, but it will give the quiche an enhanced flavor). Season with salt and pepper to taste. Remove from the heat and allow this mixture to cool off.

In a bowl beat the eggs and add the milk in. Once well mixed add in the cheese and the cool leek mixture. Once all the ingredients are well incorporated pour the mixture into the pre made pie shell.

Place in the oven on a cookie sheet and bake for 25-35 minutes, or until the custard puffs in the center.

Allow to cool before serving.

Enjoy :)

Tuesday, June 12, 2012

Tast Eatery - My Ultimate Burger

This post is long over due and I am greatly shamed for not having done so earlier. To explain my shame I have to boast a bit about my travels and experience with food and specifically burgers. Those of you who follow my other blog would know about the places I have been. With that you would also know that I am not usually one to claim I have eaten the world's greatest anything. I think this will be my first claim to that because quite sincerely I cannot find a better burger than the one made at Tast Eatery in Fort Lee NJ. I know this a big claim but trust me on this. The burger is made with organic beef from grass fed cattle that is raised humanely. It would not be on the menu if this was not the case because the owners of Tast are committed to only using products from farms that use responsible farming methods including the way cattle is raised.

My husband and I happened upon this place after we moved to Fort Lee in 2007. We noticed a nicely decorated storefront where some wonderful aromas wafted through the air any time anyone opened the door. The store was conveniently located across the street form a bus stop for the line my husband and I took into Manhattan for work.Yong (one of the partners) was absolutely obsessed with the perfect cup of coffee, so it was a match made in heaven when we met him and stepped through the door into Tast.

I have eaten burgers in some well established international restaurants and eateries in Dubai, London, Buenos Aires, Bogota and all over the US and I have never, ever, ever tasted a burger as wonderful as this one. That is my humble opinion, but if you would like to put me to the test you are more than welcome to take on my challenge and visit this place. If the burger does not get you hooked something else in their menu certainly will, and you can eat resting assured that if Yong allows the label "organic" onto anything on his menu it is most definitely what it claims to be. We have made pilgrimages to this eatery on the many occasions our travels brought us back home even if it was for a short time. I will keep on going back to Tast as long as I can get to it, no matter how far I am because it is just that great of a place and it is run by people who truly care about what they do.